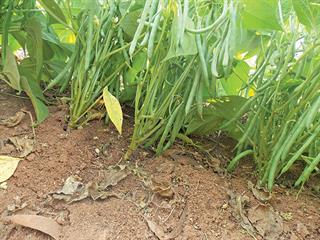
Climatic conditions on the Highveld and Middleveld are usually very favourable throughout summer, but Lowveld areas tend to be either a little too warm or a little too cold when starting off, depending on the planting time. In fact, Lowveld areas seldom have ideal temperatures for the crop, and yield potential is lower than on the Highveld. Simply put, green beans do not enjoy extremes.
Not all bean varieties do well in subtropical winters. Many produce shorter or curved pods during the cooler months, when yield can be very low. Market prices usually compensate for this, though. A good planting time in subtropical areas is March/April. In frosty areas, it is usually safe to start planting in the middle of September; you can even plant a little earlier, depending on the site and slope. The upper part of a north-west slope is better for earlier planting.
I used to plant on 9 September, but found that a cold snap often struck just before or after emergence. A late cold front after a long spell of warm weather is a regular occurrence at this time of year and catches many growers out. I now plant on 15 September.
Beans are not too fussy about soil type, so fertilise according to a soil analysis. Although a legume, this crop is not that efficient in utilising atmospheric nitrogen. Also, being so fast-growing, there is not that much opportunity for the rhizobia nodules on the roots to become fully functional. Nitrogen should therefore be included in your basic fertilisation.
Planting
The ideal row spacing for most varieties is 70cm. The spacing in the row will depend on local conditions. There will be no difference in yield between in-row spacing of, say, 5cm or 20cm. I have determined this through trials (and so has the ARC). If you try to save seed by planting 20cm apart, each plant will bear a greater weight of pods and be highly vulnerable to lodging.
With wet soil and a wind, the plants will fall over. If you plant 5cm apart you are wasting expensive seed. Aim for 8cm to 10cm in good conditions. Where there is a risk of a stand thinning due to weather, decrease the spacing a little, as the extra seed is a safeguard against too thin a stand if bad conditions do materialise.
Cover the seed with 2cm to 3cm of soil – no more. Remember that a crust can form after a heavy downpour and the seed may struggle to emerge. Where there is a risk of such downpours, plant the seed as shallowly as possible. This may require more frequent, light irrigations until the crop is up.
Too hot
Be careful in sandy soil: this can become very hot in mid-summer. If this happens before irrigation, you will have ‘bald heads’ – a seedling with two dicotyledonous leaves and no growth tip. A bald head is perfectly acceptable – but not on a bean!
If you have to plant into hot soil on a sunny day, start very early and irrigate before it gets too hot. Here you can afford to plant a little deeper, where the soil is cooler, as there is less chance that a crust will prevent emergence in sandy soil.
With an expected rainy spell, be proactive and get the beans planted just before the rain. This can be a problem in many soils. When the soil is saturated for any length of time before the seed starts to germinate, the seed becomes deprived of oxygen and will simply rot where it lies. This is especially likely when the wet spell starts off with a hard downpour. Once the root starts to emerge from the seed, it is safe.
Moist
By contrast, seed is unlikely to rot in soil with a good structure and organic content. If you can plant into moist soil, you can often get the beans up without further irrigation. Provided rain is not imminent, you can plant a little deeper to ensure that all the seeds are in contact with moist soil. Scratch in the soil a couple of days later to check that all the seeds are rooting.

