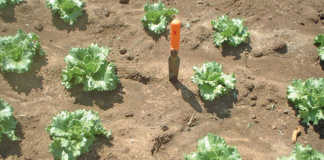
When identifying a suitable place for your vegetable plot, avoid trees or large shrubs, because they could rob your plot of moisture and nutrients. If possible, choose a piece of land away from trees and large shrubs. Depending on how much available land you have, mark an area that you’ll be able to work on. If land isn’t a problem, decide on a size with the following in mind:
- How much land is available?
- How many people will work the plot?
- How many people must the plot feed?
- How is it watered?
- What are you going to grow?
After you have identified and laid out the outside boundaries of the plot, divide it into four portions. This is so you will be able to rotate your crops. You could also add two more plots for perennial herbs and soft fruit. Rotating crops is important for reducing the build-up and breaking the life cycle of pests and diseases of single crops. Another important reason is that different crops use nutrients differently, so specific nutrients can be exhausted if the same crop is planted in the same place over and over again.


Step 1
- To divide your plot, make a path through the centre, wide enough for you and your wheelbarrow.
- Add another two paths crossing over the main path. This will divide your plot into six portions/beds. Cover the paths with bark chips or gravel to prevent them from becoming slippery.
Step 2
- The paths will help you to work the portions easier and reduce the trampling of the beds.
- Remove all the weeds from your beds, skimming them off with a spade.
- Now dig over the area with a fork, removing the remaining roots of weeds and large stones.
Step 3
- Using a spade, dig a long trench the length of the bed (a spade’s depth).
- Put the soil at the far end of your bed. You can use an old sheet of plastic or a board on which to put the soil you dug out.
- Put a layer of kraal manure into the bottom of this trench.
- Be careful not to bring the subsoil into the top layer.
- Dig the next row and cover the first row with the soil from the next row.
- Repeat this along the area, putting more manure on and covering it with the turned over soil until the end. Then use the soil from the first trench to fill the last trench. This is a process known as double-digging.
- All of this may sound like a lot of work, but it will give you years of excellent production. If you’re not used to this kind of work, then divide it up over a number of weeks.
Step 4
Let your new bed settle for at least a week before you start planting your seeds. This length of time will also depend on the season. Decide if you want to plant seeds directly into the prepared beds, or if you want to use seedlings. Put a fence around your plot to keep out cattle, sheep, goats, pigs and chickens.


