This means you may get up to four plants from each fruit. There are two ways of getting started with Swiss chard:
- Transplants: You can use seedling growers to produce plants. The higher cost should be offset by the fact that the plants come into production much sooner after planting. Weed control is also easier.
- Direct sowing: This requires a suitable seedbed at planting, something not needed with seedling transplants. You will also have to nurture the crop over the hazardous period from germination to establishment, while having to contend with weeds at the same time. More skill and experience are thus required with this method.
Another important factor influencing the method you choose is the beet cyst eelworm. If this pest is already in your soil, the plant is vulnerable to attack right from the start. It is very difficult and expensive to control, and measures have to be put in place the moment the crop starts growing. If this eelworm is going to be a problem, it’s far better to use seedlings.
Tannins and germination
Swiss chard seed sometimes contains tannins that can inhibit germination for a period. This is a safety mechanism to ensure the seed does not germinate when there is insufficient water. By the time the tannins are leached from the seed coat, the soil will be moist enough for seed growth. You can use this knowledge to get a head start with germination. Soak the seed for a day and then keep moist for another day or so before planting. This will remove the tannins and initiate germination, reducing the time from planting to emergence.
If you’re sowing directly, soaking the seed beforehand will reduce the irrigation needed for emergence, and ensure a better, more uniform crop.
All the seed you need
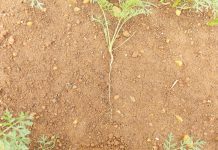
As mentioned above, a Swiss chard ‘seed’ is actually a cluster of seeds – and you can use this to your advantage. When the plants are big enough, remove the ‘extras’ and transplant them to another area. Trim the leaves fairly low down so that the damaged root system does not have to look after the original leaf area; this may be too much for it to cope with after transplanting. To cut the leaves, simply hold a bunch of plants in one hand and cut the leaves with a sheep shear. Only consider doing this if the soil is free of cyst eelworm, though.
Moisture for seedlings
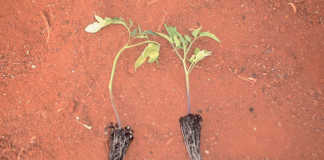
Planting with seedlings is easy. If reasonable precautions are taken, there should be no losses. The soil must be moist but not soaking wet. The seedlings should also be moist – especially in hot, dry weather – to protect the exposed fine root hairs necessary for a quick recovery after transplanting. Make sure the seedlings have enough nitrogen, essential for growth of leaves and roots. A good practice is to mix a handful of LAN in 8l to 10l of water and, using a watering can, apply to the seedlings,either in the trays or in the delivery container.This makes a considerable difference:
the quicker you can get the seedlings growing vigorously, the sooner you can harvest. You will also get a jumpstart on the weeds. If you know that beet cyst eelworm is present, give the plants a measure of initial protection by applying Oxamyl to the seedlings before transplanting. Consult your pest control supplier on weedkillers; his advice will be basedon the weeds that have emerged on your land.

