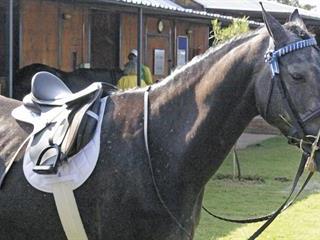
When a saddle is fitted to a horse, the animal should feel no discomfort or pain. If it does, its behaviour will indicate this. It is also important to remember that a horse’s back alters slightly over time, and you should therefore check the fit of the saddle every six months.
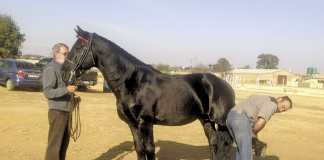
When fitting a saddle, begin by getting your horse to stand on a level surface, and give it a teff net to prevent fidgeting. Place the saddle on the animal’s neck, put pressure on the pommel (front of the saddle), and slide the saddle backwards onto the withers until you cannot move it anymore. The final position will be dictated by conformation.
Repeat this exercise a few times until you are happy that the saddle stops in the same place every time. Next, lift the flap on the saddle and look for the points, the little leather pockets on both sides of the saddle just under the stirrup bars. They should be parallel to the withers; if they are not, they will dig into the muscles and the saddle will have uneven contact on the animal’s back. To assess the point angles, look from the front with the flap lifted.
Even pressure across the back
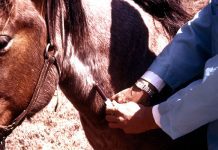
Now you are ready to assess pressure. Place one hand under the centre of the saddle and push downward to check if
the panels give even pressure. Then run your hand between the front panels and the muscles to check that all pressure is even.
Wool-flocked saddles are far superior to foam-flocked ones as wool will conform to most back shapes and can be adjusted as necessary. A badly designed or fitted tree (the base of the saddle) cannot be corrected.
The cantle (rear) of the saddle should be about 5cm to 7cm higher than the pommel. If the cantle is below or level with the pommel, the saddle invariably does not fit. The deepest part of the saddle should be level in order to place the rider’s seat bones square on the horse’s back.
Body language and discomfort
The next important fitting point is wither clearance. There should be two to three fingers’ clearance between the pommel and the withers. More than three fingers means that the pommel is too high and the tree is too narrow; less than two to three fingers means that the saddle is too low and the tree too wide.
If your saddle is stuffed with wool, make a 3cm allowance for it to settle. Horses with barrel shapes may have more clearance than usual under the withers. In this case, rely on the balance of the seat and the pommel-cantle relationship. On horses with narrow withers, a proper clearance should be maintained.
It is essential that there is adequate clearance over the spine and the connective tissue through the channel of the saddle. If the channel is too narrow the horse will never be able to move correctly.
With the rider in the saddle, make sure the cantle is still slightly higher than the pommel (so the seat is not too far back). When the rider is centred in the saddle, the length of the seat should allow about one hand’s width behind the rider’s seat and the same in front of the pelvis. The narrowest part of the saddle must fit the rider’s pelvic structure so that the seat supports the rider properly.
With the stirrups at the correct length for the rider, the knee must not be too far behind the flap, or the latter will not provide any support. It must also not be too far in front, which will disrupt the rider’s balance.
The saddle should stay in position on the back of the horse, with no excessive side-to-side or front-to-back rocking. Also, it should never lie beyond the 18th thoracic vertebrae (the last rib), as this is not a weight-bearing area. Pay attention to the horse’s behaviour throughout the fitting process. Watch its body language and ears; does it flinch when you put the saddle on its back?
Restriction and an unwillingness to stride out are all symptoms of discomfort. Your horse is the best indicator of the correct saddle fit.
Kim Dyson breeds Arabians and Lusitanos, and has 22 years’ experience in holistic equine and human body work.

