Photo: Bill Kerr
This saves a lot of hard work, and helps maintain beneficial soil organisms. Tilling soil disturbs the soil balance, and bacteria start feeding on the organic content.
Preparing the soil
A soil analysis will show which elements are lacking and whether the soil needs lime. However, this knowledge is not essential for a vegetable patch.
As the organic content increases, imbalances are corrected and fertilisation becomes easier.
If you’re not in a dry area, add calcitic agricultural lime to the soil at a rate of 200g/ m². Then broadcast 5kg cattle manure and 1kg chicken manure per square metre of soil surface.
READ The need for manure to be broken down
If the chicken manure is from laying hens, use half this amount as it is more concentrated.
Irrigate the area, then wait a few days until the soil is not too wet, but still easy to dig. The fertility will be fairly well-balanced to stimulate good plant growth and produce abundant soil organisms.
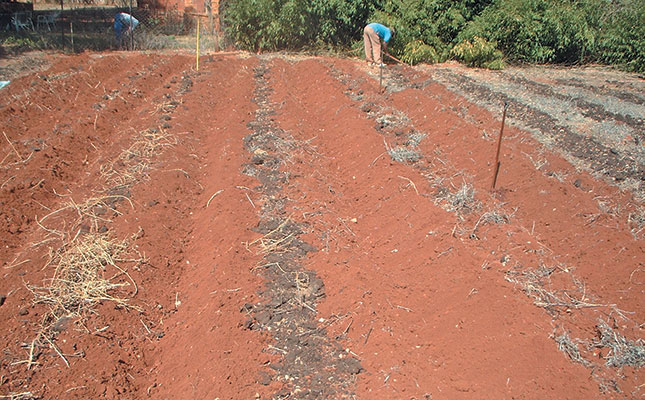
After turning the plot with a fork, place pegs 1,3m to 1,5m apart at each end. String parallel lines to the pegs on opposite sides of the land. Pull a hand hoe along each line to mark the walkway.
Next, also with the hoe, pull up soil from the marked lines to shape mounds (see photograph).
Level the pulled up soil with a garden rake to form the beds. These are now permanent, with all the topsoil in the beds and the area between them the walkways.
The beds should enable you to step over them without treading on them when working in the area.
Irrigation
Use mini-sprinklers spaced about 6m apart, depending on the size of the plot. Micro-sprinklers are also suitable, provided the drops are as large as possible.
A ball valve for each row of sprinklers provides good control. About 1mm of water irrigates about 1cm depth of soil, so apply 25mm to 30mm per irrigation cycle.
Place containers in the area for the first irrigation to determine how long it takes to irrigate to the desired depth.


