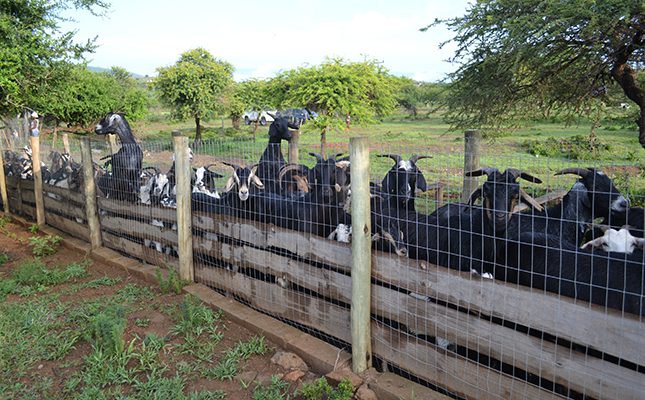
Photo: FW Archive
Many of the financial losses encountered by communal farmers are indirectly caused by the fact that grazing camps that are important to the implementation of grazing plans no longer exist because fencing has become dilapidated or dysfunctional.
Having no viable grazing camps eventually leads to overgrazing, and grass is later depleted, resulting in thin, less valuable livestock.
READ Preventive maintenance saves you time and money
Fencing materials have become expensive. Coupled to this is the influx of poor fencing materials into some segments of the marketplace, where wooden poles and droppers are often untreated or substandard and wire is often not galvanised (treated with lead to prevent rust and enhance durability).
A starting point is to ensure that when you buy such materials to inquire about whether they are indeed properly treated and meet the required industry standards.
If you do decide to purchase untreated poles and droppers, treat these with a preparation such as creosote (tar) or an oil-based compound.
Use a paint brush to apply two coats. Even painting the poles and wooden droppers with old motor oil will give them some form of protection against rainwater that eventually soaks into wood, causing it to become rotten and brittle.
When constructing a fence, the horizontal pole needs to be well fastened to the vertical posts by means of durable, thick wire such as ‘number 8’ wire.
Then you need to insert two straining wires that are attached from the bottom of the one vertical post to the top of the other.
Holes are drilled through the poles at these positions and a length of wire is looped through them before being attached to the other end of the wire. Make sure that the wire is well tensioned when joining the ends.
A piece of round bar (about a foot long) can then be used as a tool that is stuck between the two strands of the loop, after which this bar is continuously twisted in order to create a single woven thread that supports the vertical poles.
READ Some cattle fencing basics
Make certain you twist sufficiently so as to get a well-tensioned weave, but do not over-twist because the wire may snap.
When finishing both these supports, a cross shape of supporting wires would’ve been created in the box anchor, and this prevents the vertical poles (in the ground) from moving when you start to pull your fencing strands.
The vertical poles forming the box anchor should protrude about 1,6m from the ground and the horizontal support pole should be about 1m to 1,2m long at a height of 1,4m.
Some fencers use only a single pole as an intermediate anchor (anchors needed within a fencing line) or as a corner anchor, but generally, these do not offer as much support as the aforementioned box anchor.
If you do decide to use such anchors, make certain that you use preferably an ‘I-type’ iron standard (cut in half) as the anchor that keeps the pole from leaning when you start pulling fencing strands.
This anchor is created via firmly inserting the piece of iron standard into the ground with an eight-pound hammer at a 45° angle on the outside of the pole you are wishing to anchor (facing away from the pole) – about 1,2m to 1,4m away from the pole.
If you insert the standard straight, rather than angled, into the ground, the piece of standard will invariably move when you tension your fencing wires and your strands will not be taut.
READ The proper fencing to keep sheep and goats safe
Hit the standard firmly into the ground until only about 5cm is still showing.
Again, you loop a piece of number 8 wire through the tip of the protruding iron standard and through a drilled hole that is about three-quarters of the way up your anchor pole.
Pull one end through the hole and join to the other end before again twisting/weaving the wires as was earlier explained, until taut.
Other considerations
- Insert all poles not less than 60cm in length into the ground in a square hole that is 40cm x 40cm wide. Compact the soil surrounding the pole using the tip of an I-type iron standard and only refill small quantities of soil at a time.
- Keep refilling and compact properly until the hole is full. Never fill the hole with stones as this will result in an unstable anchor.
- In the fencing line, insert anchors where there is a drastic deviation in the lay of the land (steep drops or lifts). Thinner (50mm to 75mm in diameter), unanchored intermediate poles should be inserted every 25m to 30m (in holes as mentioned above).
- Droppers should be 3m apart and iron standards inserted every 10m to 12m. Every 50m of the line, a thicker anchor pole (120mm to 150mm in diameter), anchored on both sides with number 8 weaves, should be inserted and compacted properly.
- Always ensure that you use a spirit level so that all inserted poles are inserted straight into the ground, because any leaning pole may lean more when fencing strands are pulled.
Shane Brody is involved in an outreach programme aimed at transferring skills
to communal farmers.


