
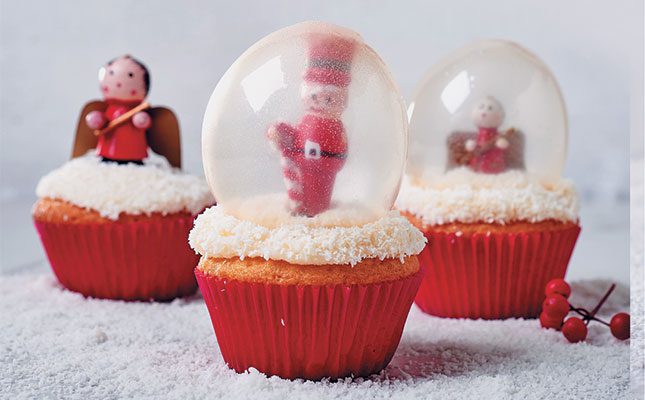
Cupcakes
- 125g soft butter
- 3ml coconut or vanilla essence
- 180ml castor sugar
- 2 eggs
- 80ml coconut milk
- 125ml desiccated coconut
- 310ml self-raising flour
- 80ml red glacé cherries
Filling (optional)
- 125ml icing sugar
- 45ml cream
- 5ml vanilla or coconut essence
Icing
- 30ml soft butter
- 5ml coconut essence
- 90ml cream
- 625ml icing sugar
- 250ml desiccated coconut
For the globes
18 x 2g gelatine leaves
Method
Makes 12 Takes 1 hour + cooling
- Advertisement -
- For the cupcakes, preheat oven to 180°C. Line a standard cupcake pan with 12 cupcake cases.
- Beat the butter, essence, sugar and eggs until well combined. Stir in the coconut milk and coconut. Fold in the flour. Divide between the cases, inserting a cherry in the middle of each. Smooth the surface. Bake for about 20 minutes or until a testing skewer comes out clean. Cool.
- For the filling, combine all the ingredients until smooth. Draw up with a syringe and insert into the cupcakes.
- For the icing, beat the butter and essence until creamy. Beat in the cream and icing sugar until smooth (it should be quite firm). Gently spread onto cupcakes. Press the cupcakes upside down into the coconut.
- Place a figurine on top of each cupcake and cover with a globe.
Globes
- For the globes, soak the gelatine in a bowl of cold water for 10 minutes. Squeeze out the excess water and place in a small, deep bowl.
- Blow up 12 small water balloons slightly smaller than the top of your cupcakes. Spray cooking spray on one hand and rub your hands together. Gently rub the balloons (they shouldn’t have too much oil on them or the gelatine won’t stick).
- Heat the gelatine in the microwave for about 30 seconds or until just melted. Do not boil! Quickly dip a balloon in gelatine, turning until coated as far as the knot, using a spoon if necessary. Turn the balloon over, allowing the excess to drip back into the bowl.
- Once it has stopped dripping stick a skewer through the tied-off part of the balloon. Stick the skewer into a styrofoam board at an angle so the balloon doesn’t touch the skewer. Repeat until all the balloons have an initial gelatine layer and set for 10 minutes or until they’re no longer sticky.
- Re-melt the remaining gelatine for 10 seconds at a time as required.
- Re-dip the balloons. Set aside for about 24 hours until hard (if you tap on it, it should sound like glass).
- To remove the balloons, cut a hole near the knot, spiralling ⅓ of the way upwards. Ideally, the balloon will shrivel up and release easily. If it doesn’t, set it aside and eventually it will pull away.
Tips
- Shaking the excess gelatine off the balloons is quite messy, but ensures a smooth globe. Rub your hands with cooking spray to minimise the amount of gelatine sticking to your hands.
- Speed up the drying process by placing the balloons in front of a low fan for about 6 hours.
- The globes will last indefinitely if stored in a dry place.
See Farmer's Weekly first on Google
Add as Preferred Source
Follow Farmer's Weekly on Google News
Follow on Google News
- ADVERTISEMENT-


