

As we learnt last time, long lining is a technique used to teach a horse how to steer, stop, bend and give. And I trust you’ve spent the past fortnight getting your horse used to the idea of having a rope touching all parts of its body. Now, bearing in mind that to begin long lining, your horse has to know how to walk forward when you cluck to it, attach just one long line to the side buckle of the halter.
Teach the horse to walk in a circle around you and to halt when you say “stand” and walk when you say “walk”. Change rein. Then include straight lines. When telling your horse to walk on, move behind the hip, creating a triangle – the horse is one point, the long line is the other, and you complete the triangle. When you’re good at this, you’ll be able to get your horse to turn away from you completely.
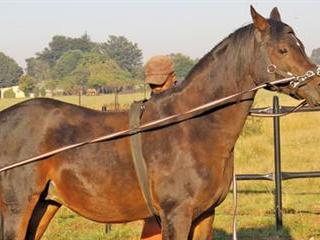
Surcingle
It’s now time to include a surcingle, roller or saddle. Run the second long line through the lower ring of the roller or through the stirrup of the saddle, and run the other long line over the saddle behind the pommel. Remember that inexperienced young horses get nervous when they can’t see you behind them. So constantly remind the horse that you’re there and practise doing circles and straight lines.
The inside rein is attached to the halter’s side buckle and runs through the mid ring of the roller. The outside line is attached to the side buckle of the halter and runs over the horse’s back, and is used to keep your horse straight. Once your horse is moving forward, halting, moving in a circle and on the straight, swap the connections and change direction.
Turns
When your horse is very confident on both reins, you can run the lines through the surcingle or roller rings on both sides of its body. Making sure the lines are parallel to each other, you can now teach your horse to turn left or right. In the beginning it’s very important to stay on your horse’s left side (behind it, but where it can see you) when turning left. When turning right, switch to the right side.
Next begin moving in behind your horse for one, then two, then three steps while they go straight before you change direction, moving to the left for a left turn or the right for a right turn. Once you’re happy your horse trusts you and understands what’s expected of it for four days in a row, replace the halter with a bridle and chunky snaffle bit. Practise rein change, circles, straight line stopping, rein back and trotting, then set the lines so that they go from the bit to the top rings on the surcingle, or just below the pommel – and repeat the exercises.
Weight
The next step is lateral work and introducing obstacles. The most rewarding thing is that when you do back your young horse, it is capable of steering, backing, stopping and trotting. All it needs is to get used to the idea of you on its back. When we back youngsters, we spend six weeks teaching them to long line with a roller before introducing a saddle. Then we long line for another two weeks with a saddle.
Next we place a feed bag over the saddle and, over a period of six weeks, gradually add weight to the bag, stopping at 50kg. This helps your youngster get used to carrying weight and learning to balance the new weight.
Contact Kim Dyson on 082 888 6511 or at [email protected]. Please state ‘Horse therapy’ in the subject line of your email.


