

Pastry is no big deal but making it is a skill that gets better and better with practise. Start by mixing together the flour and the icing sugar. Note that icing sugar is not quite the same as castor sugar so take care when measuring your ingredients, since you will be using both types of sugar. Cube the butter and drop it into the mixing bowl. Using your hands, reduce the butter, flour and icing sugar so that it resembles bread crumbs.
Separate the eggs and pour the yolks into a bowl and mix until the contents make a tight, evenly textured dough. Use a little cold water if the dough is too dry. Remove from the bowl and knead and then flatten the dense ball of dough. Wrap this in clingfilm, stick it on a plate and let it chill in the fridge while you get on with the filling.
This bit of the procedure is simple. Combine everything in a mixing bowl, except the lemon zest. This is the thin outer layer of the lemon peel, best removed by a dedicated zesting tool, a fine cheese grater or with care, the small blade of a Swiss Army Knife. Note that the zest is the outer layer only of the peel and not the white part of the peel. Pour the mixture through a conical sieve into a jug and then mix in the strands of lemon zest.
Pastry time again. Wipe the sweat of anxiety off your brow, and roll out the chilled pastry to a thickness of 3mm to 4mm. Convey this layer of raw pastry to the waiting pie dish or tart baking tin and press it into place. Trim off the excess. Put the dish or tin plus pastry back in the fridge for half an hour. Now for the madness that springs entirely from the unimaginable. Prick the pastry with a fork several times.
Cover the raw pastry with foil and pour in a couple of hundred grams of dried beans. Stick this into the oven preheated to 160°C for 10 minutes, then remove the foil and beans and let it bake for another 15 minutes or so. The beans serve to keep things level. One can only admire the mind that invented this procedure.
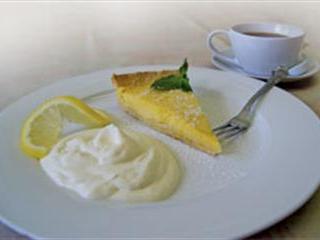
Make sure the pastry is a nice biscuit-coloured light brown, then let it cool. Once the pastry has cooled, carefully pour in the filling so that you do not mess it on the pastry crust. Now for the tricky bit. Carefully, with a steady and a level hand, place your dish into the oven, so as to not bump or tilt it. A tense business, but well worth it in the end.
Contact David Basckin at [email protected]. Please state ‘Real cooking’ in the subject line of your email.


