
Smallholder farmers often don’t have the money to get to specialised places selling seedlings.
I recently undertook a trial to self-produce seedlings and the outcome was very positive – many of the cabbages produced from these seedlings have already been sold.
While producing seedlings is in some respects quite technical, it’s not that difficult to master, and with some innovation and good care, you can produce seedlings that should result in healthy cabbages.
Producing seedlings in a ‘professional’ manner requires infrastructure and equipment, such as temperature-controlled areas or greenhouses and purpose-fit seedling trays, but if you cannot afford these or don’t have access to them, you can always innovate.
Some prospective producers may also not have access to sanitised potting soil, but this hurdle can also be overcome.
Improvised equipment
If you do not have seedling trays, you can utilise anything from old ice-cream tubs to 2ℓ cool drink containers. The tubs can be used as they are, while the cool drink containers can be cut in half lengthwise. Yogurt cups or old egg boxes can also be used.
Barring the egg boxes, remember to sanitise these containers by washing them thoroughly with soapy water and then sanitising them with one part bleach and 10 parts water. Prevent later waterlogging by carefully punching small holes in the bottom of the containers with a sharp object.
Lay a thin layer of pebbles or small stones at the bottom of each container to improve drainage, which greatly reduces the chance of root rot.
You can make your own version of potting soil by using two parts garden soil, one part compost, and one part sand. Mix these well and make sure that the sand and soil are as clean as possible and as free as possible of root material or weed seeds.
Fill the containers with this potting mixture, but stop at about 8mm from the top. Always make sure that seedling soil is kept moist, but not waterlogged or flooded.
Planting
- Push the seeds (which can even be bought at some supermarkets, and I advise Conquistador or Drumhead varieties) about 8mm into the soil and lightly cover and compress (this is about three-quarters the length of an index finger nail).
- Plant the seeds about 3cm apart.
- If you don’t have a few granules of fertiliser like 2:3:2 or 2:3:4 to apply within close proximity of each seed, use a pinch of dehydrated, dry chicken litter as an organic substitute.
- When watering the seeds after planting, rather use a spray bottle or sanitised old cool drink bottle to make a spray bottle by punching numerous holes in the lid and squeezing the water out to irrigate seeds. Using heavy flows of water may dislodge the soil and the seeds.
- Place the trays near or against a sunny wall to reduce exposure to wind, but they should not always be in sunlight to prevent overheating. You can either use a piece of shade cloth (that still lets about 50% to 70% sunlight through), or you can place the trays under a tree that allows some sunlight through.
- Seedling trays should be elevated from the ground and placed on firm stands that allow air circulation under the trays.
Germination
- Seedlings germinate and grow best in temperatures ranging from 15°C to 21°C, so you can gauge what area they should be placed in.
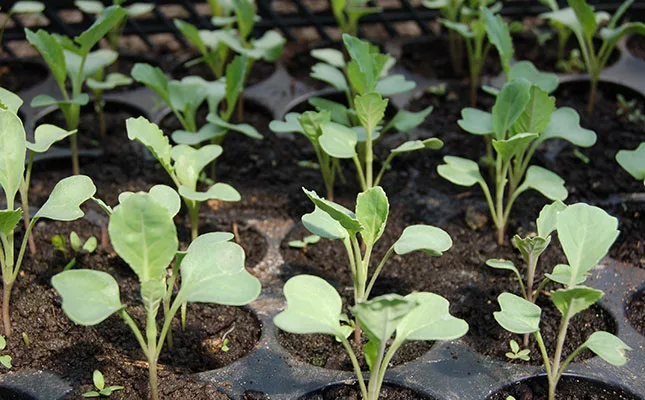
- Seedlings will usually be ready for transplanting about three to four weeks after planting, when they have two to three leaves. Be careful when doing this as you don’t want to disturb the roots or lose too much of the soil around the root systems.
- Place seedlings about 40cm apart into growing beds, and press them firmly but not too hard into loose and moist soil. Seedlings must face upwards rather than sidewards.
- Keep the beds consistently moist for the first few weeks and try to fertilise or apply manure at least three times during the lifespan of the cabbage plant.
- Be on the lookout for plant diseases such as powdery mildew, and parasites such as worms, bugs and aphids. Spraying the cabbages with garlic water can assist in reducing parasite loads, and if you use chemical sprays, make sure it’s a product listed for use on food crops.
- There are relatively cheap antibacterial powders that can be purchased to prevent diseases or conditions like mildew, and these can be sprayed every 10 days or so.


